Have you bought a digital cut file from me, and you’re having trouble editing it? Please never hesitate to reach out! I have recorded a video below with step by step instructions on how to change the name on the Frankenstein Monogram Box File. I hope it helps you!
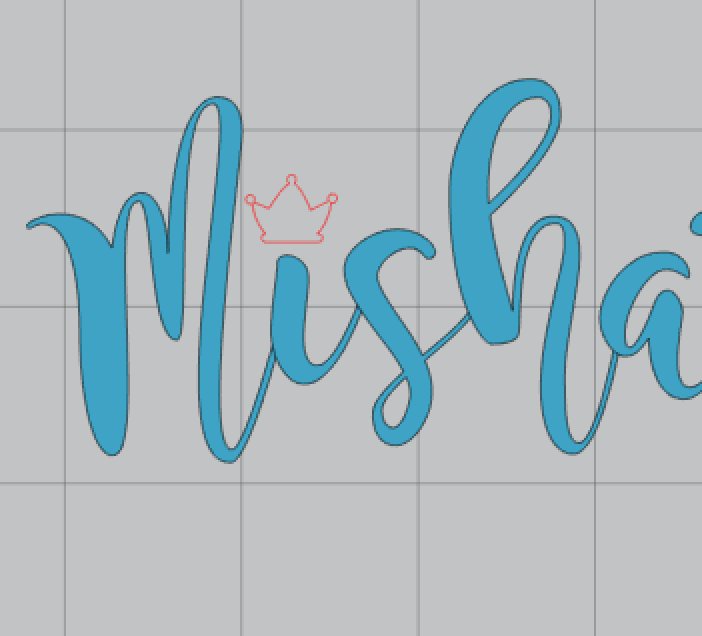
How to design a Custom Decal in Silhouette Studio 4.1
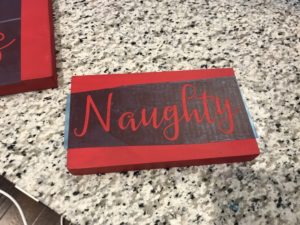
Here’s a quick video using Silhouette Studio 4.1 to replace a dot over the letter i with a crown shape. This is a super fun, cute way to personalize things, and the same process could be used to replace the dot with snowflakes for Christmas, or hearts for Valentine’s Day etc.
If you are making cup decals I highly recommend ordering Oracle 651 and hand washing. I also like to use contact paper to apply the decals so that it is see through, which helps me with placement. If you are using boxy fonts or fonts that aren’t as forgiving with placement on a curved item, check out the Warp tool feature which is now available to users of the Dssigner Edition and Business Edition versions of the Silhouette Studio software. It adjusts the letters for you to help keep them level as they curve around the item you are personalizing. It also works on shapes too!
If you have never placed a decal on an item check out my blog post on how to install a decal to a glass. This can be tricky at first, so practicing a few times might help you learn how to install it just right! The same process can be used on ornaments and vases.
Here are some links to where I order some of my supplies from amazon. I love the free shipping with prime. Everything ships fast and I get great products with great prices and can see the reviews from others before I buy. If you aren’t buying from amazon, you should check them out as soon as possible!
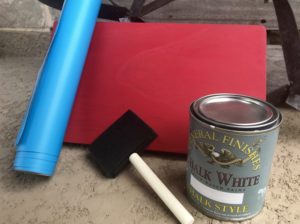
Here are the supplies I would use for this project:
Silhouette Cameo 3
Transfer tape to move the decal from the paper backing to the cup
Oracle 651 Vinyl in Black. The color I use the most, so I buy it in rolls
Assorted vinyl pack lets you see lots of colors!
Wine glasses to personalize. You can also find them cheaper at Dollar Stores or Target, but this is convenient and they have great reviews right now.
Are you wanting to make wood signs with vinyl? Here’s a complete tutorial showing you the supplies I use and the steps I take to make wood signs with vinyl.
I love to make wood signs with vinyl because I don’t have to finish the entire project in one night. I rarely have time to complete any crafting projects in one night with my son running around. Using this process, you can start and stop as needed. Lets get started.
Supplies to Make Wood Signs with Vinyl
1.Pick your base- Lowes has a great selection of Pine, my favorite, but if you aren’t comfortable with a saw, or have been forbidden from using it because your husband thinks you don’t pay attention, then a blank sign from Hobby Lobby or Michaels are the perfect choice to make wood signs with vinyl.
I like to use Pine when I make wood signs with vinyl. It stains and paints easy, is smooth and requires little sanding. Also worth mentioning, I can staple a hanger on the back by myself. You can also make wood signs with vinyl from pallet wood, old fence panels, or an old cabinet door! The smoother the wood, the less bleeding you will encounter, but I have tips below to help prevent bleeding!
2. Stain or Paint- My favorite wood stain when I want to make wood signs with vinyl is Rust-Oleum Kona . It comes in several colors and dries in an hour or so, so I can stain my wood while my son is sleeping, apply the stencil I cut out with my Silhouette Cameo 3, and seal it in the same day!
*Remember to work in a well ventilated area and wear a mask if you are sensitive to fumes*
Chalk paint has almost no smell. If you are sensitive to fumes, I recommend using it to make a wood sign with vinyl. It goes on like butter, fills in some or all of the wood dents, and can be distressed in different ways.
Annie Sloan chalk paint is amazing! If you try other brands, and then this brand you will never go back! I pick up my chalk paint at a local boutique, but you can make your own chalk paint, or order it on line too. I love chalk paint over staining when I make wood signs with vinyl because it doesn’t give off the harsh smell that stain does. As a result, I can paint in the garage while my son is decorating a bird house or watering plants. You might be able to find it in a local boutique, but here’s an amazon link below just in case!
Acrylic paint- If you aren’t quite ready to invest in chalk paint to make wood signs with vinyl, you can use acrylic paint. My favorite one is Americana in White. It dries fast, gives great coverage, compared to other acrylic paints comes in lots of colors, and is affordable! I normally have to do a few coats with this depending on the color i’m using. It also is more likely to peel up when removing the stencil, but a quick touch up can fix any boo boos.
3. Paint Brush- I like to use foam brushes and just toss them afterwards to apply the paint and stain when I make a wood signs with vinyl stencils. They don’t leave the brush strokes that a regular paint brush leaves, they apply a smooth coat, and you can dab them in an up and down motion when filling in the stencil. This helps prevent bleeding. Because I am cheap, I sometimes cut the tip off of one and then use it again for the next sign if the paint hasn’t saturated the brush!
4. Oramask stencil Vinyl for stencil or oracle 631- I prefer the Oramask Stencil Vinyl with my cutting machine when I make wood signs with vinyl stencils because it is a little see through. This makes it easier to see where you are placing it on the sign. It also easily tears off in pieces when you are removing it which can be helpful. In addition, the blue film isn’t as sticky as vinyl, but gives a great seal. It is made for making sign stencils. Definitely a game changer for me when I started making signs to sell.
5.Contact Paper-The Contact Paper is used to transfer the stencil from it’s paper backing to the wood. Once you have it on you can use a Scaper like this one to smooth the stencil onto the wood. I sometimes use a kitchen spatula or plastic spoon when I can’t find mine! =)
6. Stencil- I use my Silhouette Cameo 3 and Silhouette Studio Software, which is included, to create the designs I use when I make wood signs with vinyl. I have been using this brand for several years and just upgraded to the new model.
I used it to cut the stencils for all of the signs below! My Cameo Craft Class group will be learning to use this vinyl in the future to make signs. If you are interested you should join us! It’s an on line instruction on how to make everything step by step!
7. Sealer- After you apply your painted stencil, I highly recommend sealing it. Chalk Paint has a wax sealer you can use, but it has to be reapplied every so often, which I don’t have time for, so my go to sealer for al signs is Minwax Polycrylic in Satin Finish . It comes in glossy too, but i prefer the satin! It doesn’t yellow over time, and can be applied with the foam brushes too!
Steps to Make Wood Signs with Vinyl Stencil
Cut your wood and sand the edges until its smooth. Clean all the excess dust and dirt off with an old cotton shirt or paper towel
Apply your stain or paint with a foam brush to one side and let it dry. Once dry, flip and stain the other side.
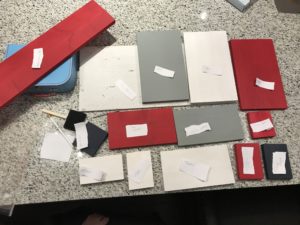
I came up with different ideas to put on each sign, and wrote it out before designing in Silhouette Studio 4.1.
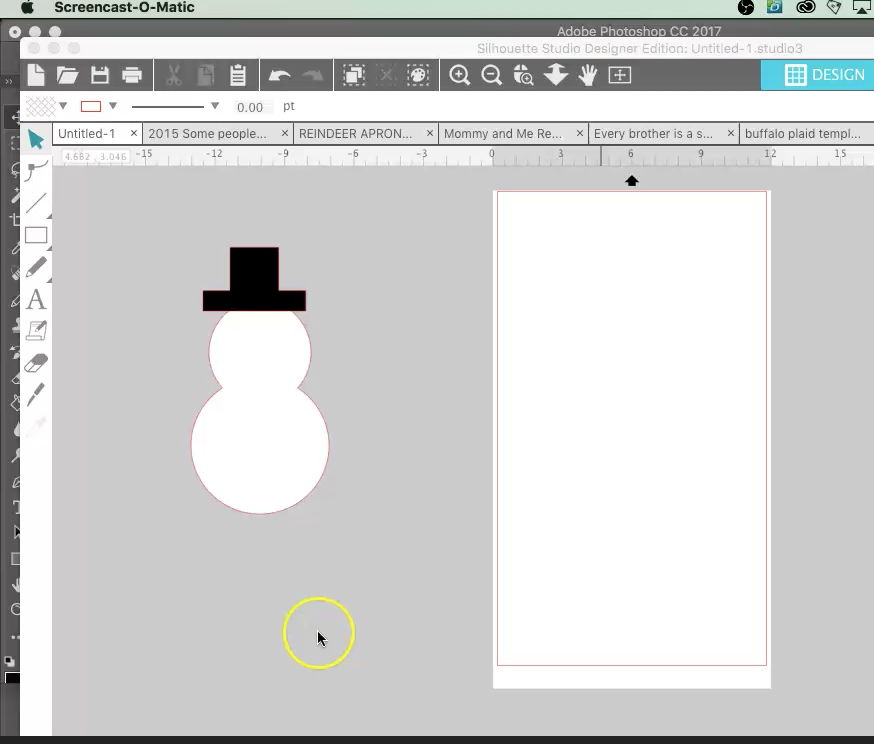
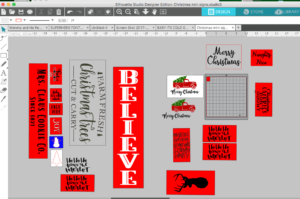
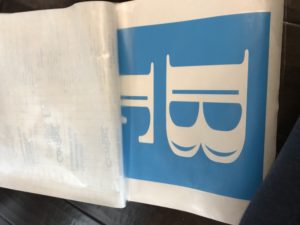
Cut out your stencil! I like to measure my sign and then draw a rectangle that size in the Silhouette Studio 4.1 software so that i know how big i can make my design. place the stencil material blue side up on your cutting mat, cut on the matte vinyl setting, and then weed out the part you want to fill in with paint.
This is what the design software looks like when I set up my designs for cutting Oramask Stencil VinylWeeding the stencil vinyl before applying it to a wood sign
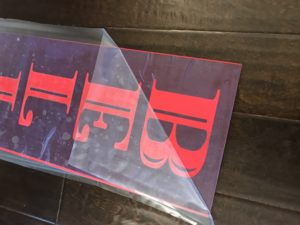
Use contact paper to transfer the stencil to the sign. I like to use it because it’s not too sticky, and it’s clear making placement on the sign easier. You can use other transfer tape, I just prefer contact paper for this particular project. For longer signs it is easier to start at the top and line up the edges of the contact paper with the edge of the vinyl backing paper. Then slowly roll down and smooth with the scraper.
Applying Contact Paper to Stencil
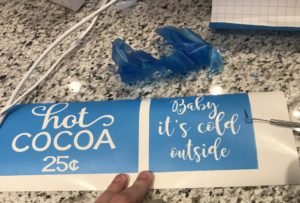
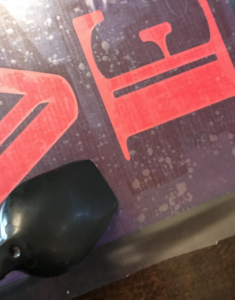
Once the stencil is secured to the contact paper, gently lift it off the backing ensuring you pick up all the pieces, and line up the top corners and gently smooth down. For longer signs, keep the backing paper close in case you need to put it under the design. This can aide in lining up the stencil to the sign.
slowly removing the contact paper from the signBurnishing the transfer tape
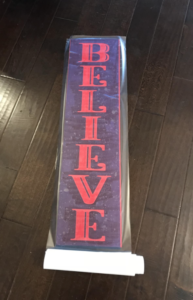
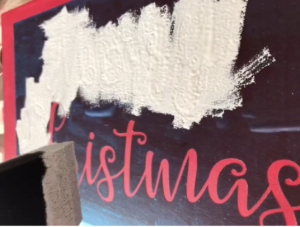
Fill in the Design with paint. Once the stencil is on the sign, use your foam brush to gently fill in the stencil. I like to start towards the middle and work my way out. Make sure you don’t get too much paint. Dab off the excess on a paper plate a couple times before you dab the sign. If your wood surface is bumpy add a coat of Mod Podge to the stencil edges and let dry before you paint. This will help make crisper lines. After 2-3 coats of paint you can remove the stencil. Use a sewing pin to remove the inner parts of A’s E’s O’s etc easily.
If you are newer to stenciling there are tons of places to get designs when you want to make wood signs with vinyl. You can check out the design store here for some ideas including one of my best sellers the Hot Cocoa sign. https://whimsywillowcreations.com/product/hot-cocoa-cut-file/
Seal-One last step to make wood signs with vinyl. Seal that bad boy with a thin coat of Minwax listed above. Let it dry overnight. Here in Houston I let mine dry 2 days.
If you plan to make lots of signs, these sawtooth hangers are amazing, and less expensive than buying them at the hardware store normally! I attach them with my staple gun, or you could use command strips to hang them too!
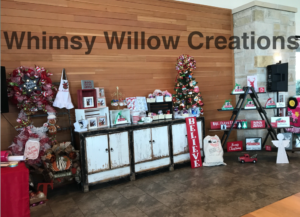
Finish projects sold well at my craft show!
Craft Show Display with ornaments and wood signs
I want to see what you create! Join us on Facebook at Cameo Craft Class to share!
Happy Crafting,
Disclaimer: This post contains affiliate links for products I have used to create crafting projects. I am sharing with you. If you plan to craft and purchase from these links, thanks! I get a small percentage that goes towards keeping this site live!
Where to find cute Christmas SVGs and fonts you ask? I was looking for Christmas SVGs and Christmas fonts to cut yesterday, and look what I found y’all! The Christmas Craft Bundle that has everything we need this holiday season to craft down the days until Christmas! This file will save me hours of time searching for designs and fonts, and get me in the craft room preparing for my next craft show! I cant wait to decorate my house for Christmas!!! I love snowmen, and Santa, and living with my 5 year old son who loves to help me make fun things! Below I posted pics of some of the cuteness…I’m going to be so so busy…join me!
– 21 fonts included in the bundle and all of them have commercial use for life rights!
– Over 160 SVG files, Here are a few of my favorites, all with commercial use rights so you can create and sell what you make guilt free!…there are so many more in the package, but the package is only $29! I have paid $3 each for svgs on Etsy, and this is 160 for $29, and it has fonts too! Check it out. Link posted below
– Over 800 Design Elements….I saw some awesome lightbulb frames, and wreaths and and and this is going to be all I need the next 5 years to make Christmas stuff. I can’t believe it’s on sale for only $29. I paid more than that for one font!
That’s a lot of Christmas Crafting y’all! It has SVGs for Santa Sacks, Countdown to Christmas Chalkboard signs, Monogram Snowman frames, and so much more. Check these out, and click the picture below to to see all of the included designs!
It’s only $29 on sale, so grab it before they change the price.
Happy Crafting,
If you like this post, you may also like the Silhouette Cameo 3, I use it to make all of my crafty projects!
Disclaimer: Some of the links in this post are affiliate links that pay me a small amount which helps me pay for the upkeep on this blog!
How do you ship glass ornaments so they don’t break? I’m no expert, but I have shipped over 1,000 just like this, and I’m here to share my best shipping tips with you! Don’t be scared. People love to buy Christmas ornaments for Christmas gifts, and personalizing them with a silhouette cameo is easy, so don’t let shipping hold you back!
Put a scrunch of packing paper in the bottom of the box
Wrap the ornament in 2 12×12 sheets of bubble wrap.
Place ornament inside box. I use 6x6x4 for the M&M style ornaments and 5x5x5 inch for the medium round and 6x6x6 for the large round size.
Fill in the top of the box with more packing paper so that the ornament doesn’t move.
Ship First Class Mail. Do not ship priority unless you double box. Priority mail takes boxes up to 70 pounds and your pretty ornament will be destroyed!
You can print labels from home using your home printer and tape them to the box, or if you start selling and print lots of labels get a DYMO 4XL label printer. It was by far the best thing I bought my crafting business last Summer, and I use the aftermarket labels below. 220 rolls for $8 is a great deal and saves so much packing tape! With the Dymo 4xl you can print labels with Etsy or Paypal, and they have discounts on shipping with USPS and even Fed EX.
Here are the supplies I use to ship if you need quick links!
Disclaimer: Links in this blog post are affiliate links which pay me a small commission to share my knowledge with you. That small percentage pays for my web hosting and crafting supplies, so I can make more blog posts! Thanks!


 If you plan to make lots of signs, these